How to Host a Website on an AWS EC2 Instance?
Hosting a Website on an AWS EC2 Instance: A Comprehensive Guide
Hosting a website on an AWS EC2 instance can seem daunting if you're new to cloud computing, but it’s a powerful and scalable solution for web hosting. This guide will walk you through the process step-by-step, from setting up your EC2 instance to deploying your website.
Step 1: Create an AWS Account
If you don’t already have an AWS account, follow these steps:
1. Visit the AWS homepage and click on "Create an AWS Account".
2. Fill out the registration form with your email, password, and other details.
3. Verify your email and provide billing information.
4. Choose a support plan and complete the sign-up process.
A Step-by-Step Guide for Creating an AWS Account. Click here
Steps to SSH into Your EC2 Instance
Step 2: Launch an EC2 Instance
1. Navigate to the EC2 Dashboard:
- Go to the AWS Management Console.
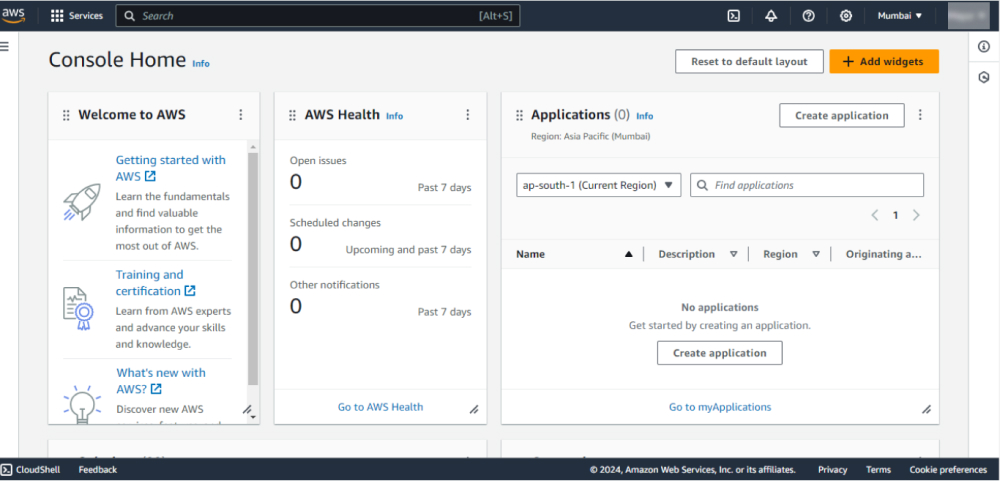
- Select “EC2” under the “Compute” section.
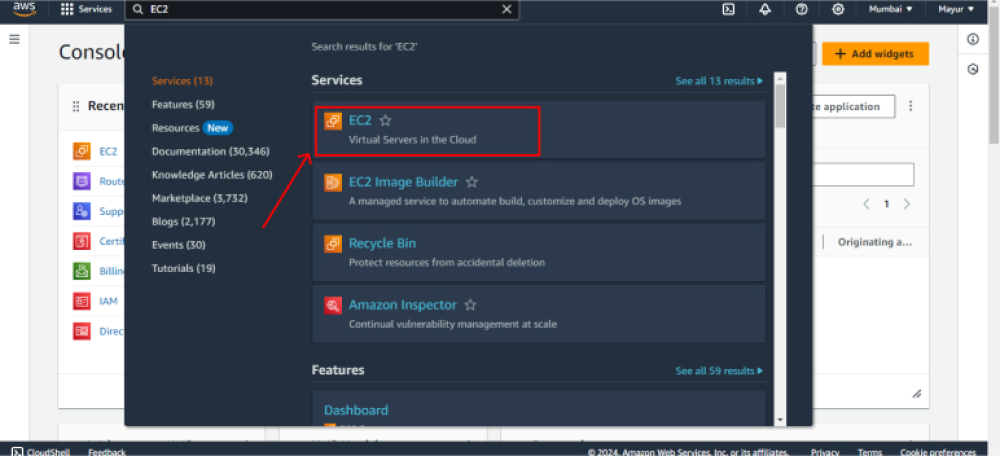
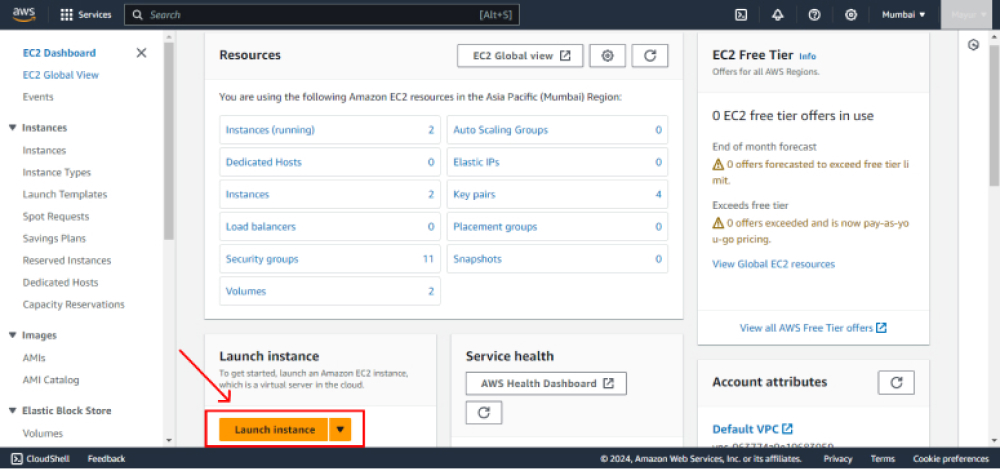
2. Launch an Instance:
- Click the “Launch Instance” button.
- Choose an Amazon Machine Image (AMI). For a typical web server, select an AMI with Ubuntu Server or Amazon Linux.
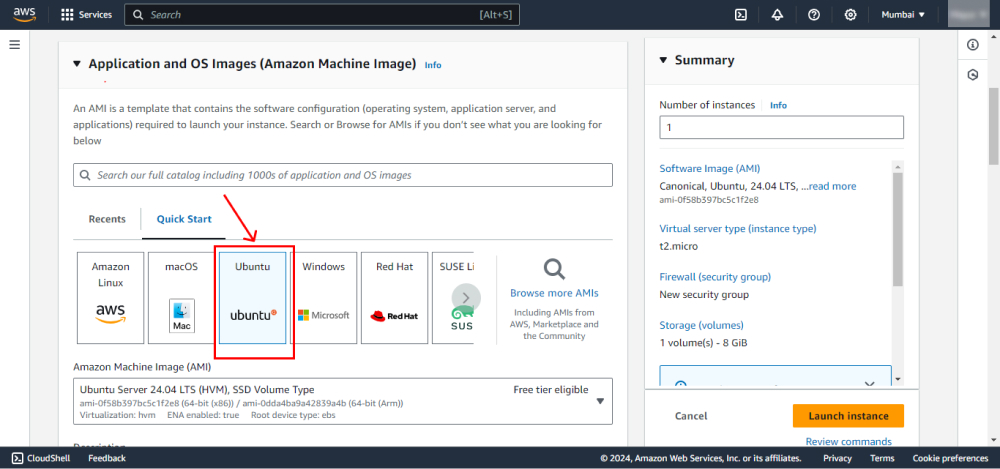
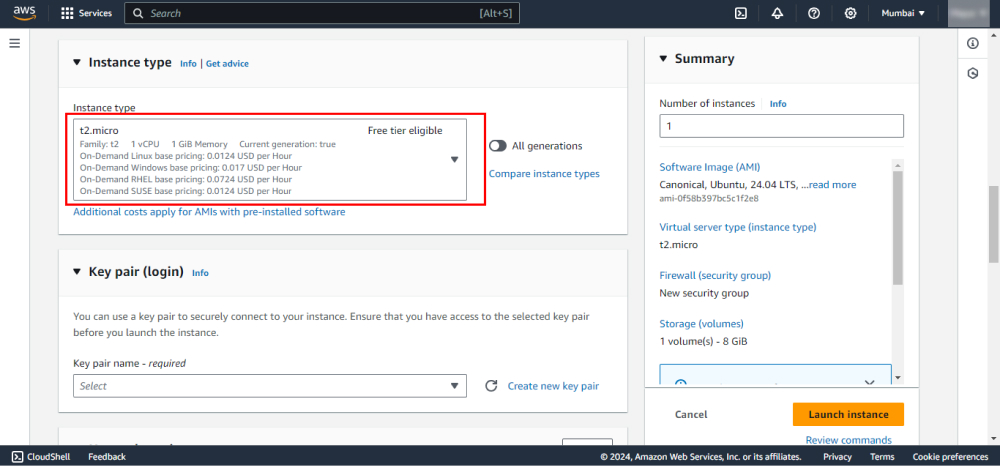
- Choose an instance type. The t2.micro instance is sufficient for a small website and is eligible for the free tier.
3. Configure Instance Details:
- Adjust settings as needed. For most beginners, the default settings are sufficient.
- Add storage if necessary. The default 8 GB is often enough for a basic website.

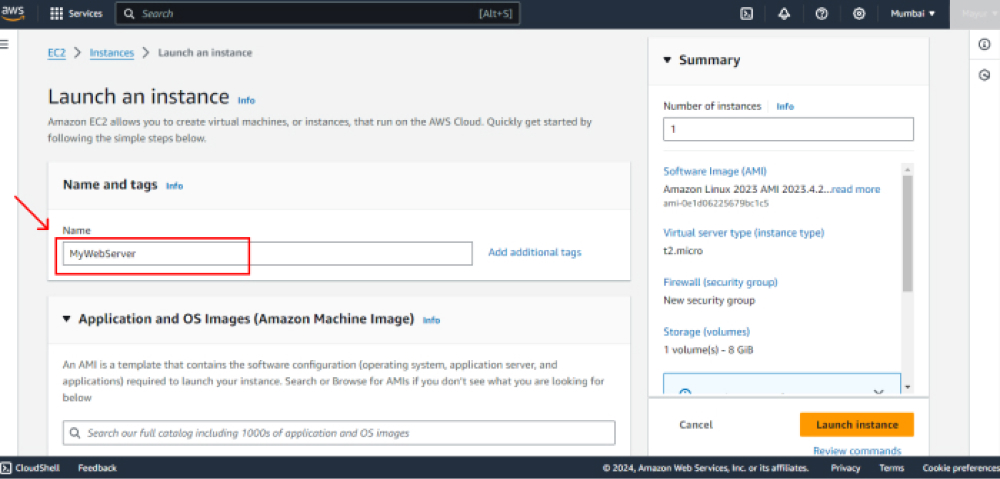
4. Add Tags:
- Create tags to identify your instance easily (e.g., Name: MyWebServer).
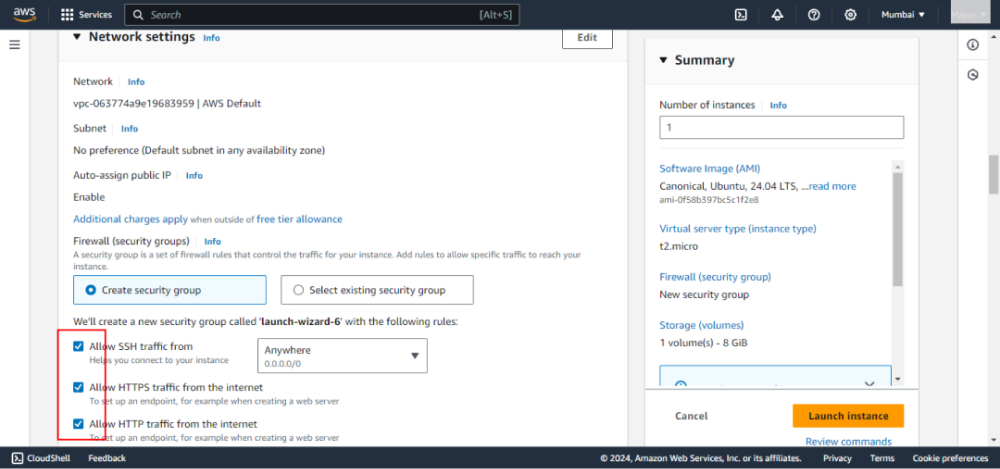
5. Configure Security Group:
- Add rules to allow HTTP (port 80) and HTTPS (port 443) traffic.
- Ensure SSH (port 22) is open for remote access.
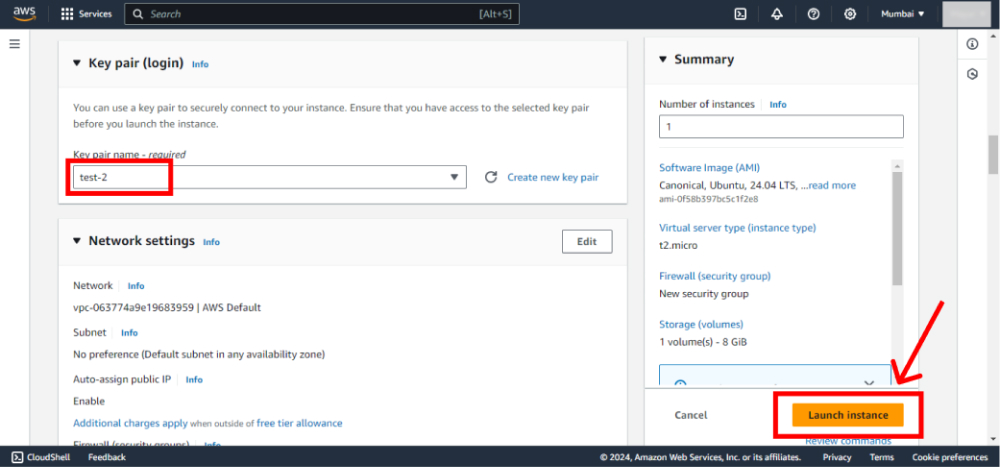
6. Review and Launch:
- Review your settings and click “Launch”.
- Select or create a new key pair for SSH access and download the key pair file (.pem).
Step 3: Connect to Your EC2 Instance
-
Open your terminal.
-
Navigate to the directory where your key pair file is located.
Eg: Your file is located in the ‘test’ directory.

- Change permissions of your key file to ensure it’s not publicly viewable:
icacls.exe your_key_name.pem /reset
icacls.exe your_key_name.pem /grant:r "$($env:username):(r)"
icacls.exe your_key_name.pem /inheritance:r

- Connect to your instance using SSH:
ssh -i "your-key-pair.pem" ubuntu@your-ec2-public-dns
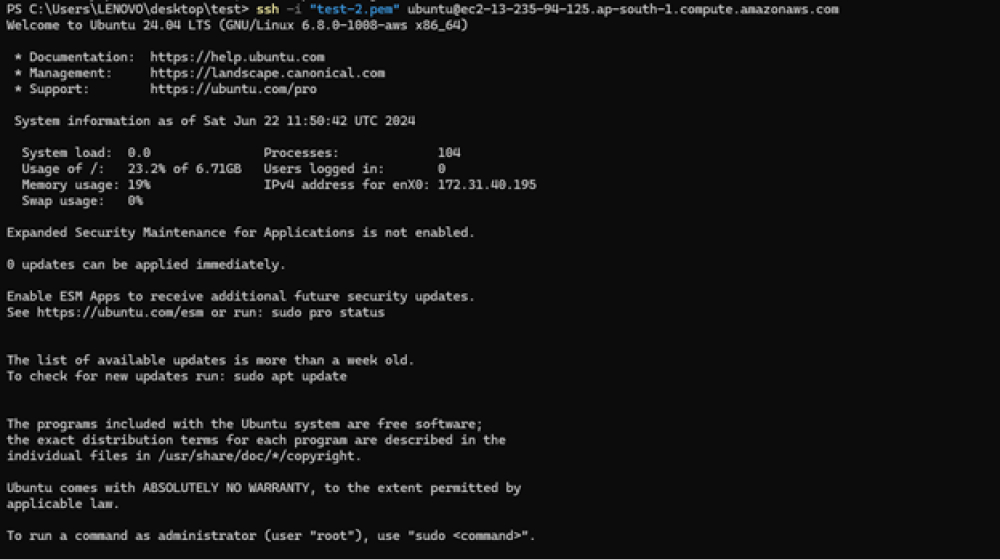
You can get your EC2 Public DNS from here:
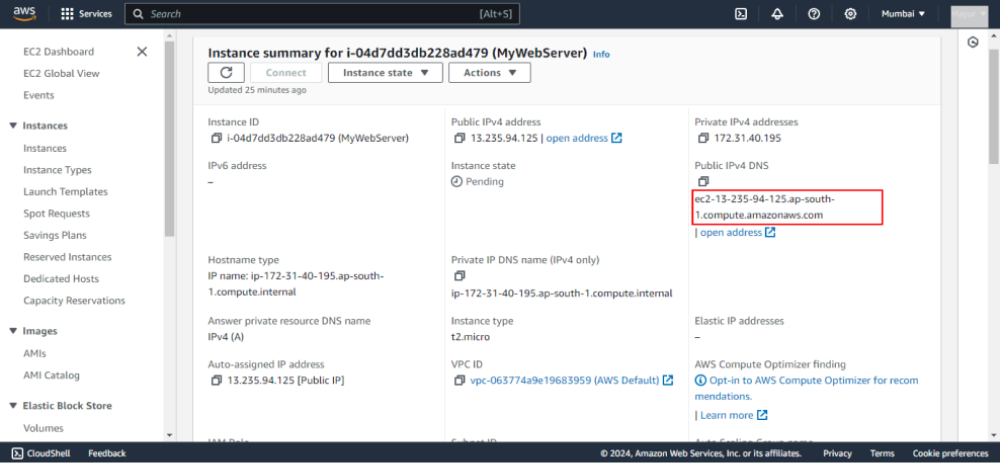
Step 4: Set Up the Web Server
- Update the package index:
sudo apt update
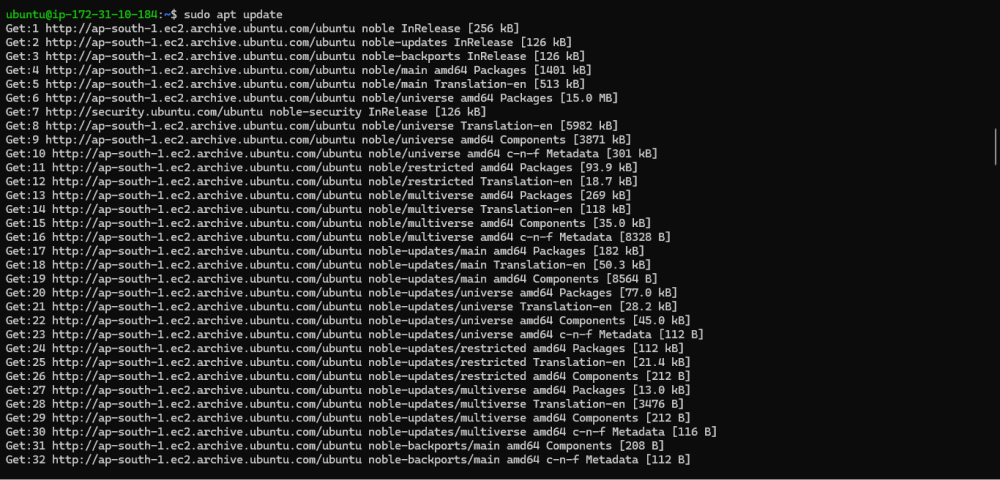
In the terminal window use the SSH command to connect to your EC2 instance. The basic syntax for the SSH command is:
ssh -i /path/to/your-key-pair.pem ec2-user@your-instance-public-dns
- Install Apache (for Ubuntu):
sudo apt install apache2 -y
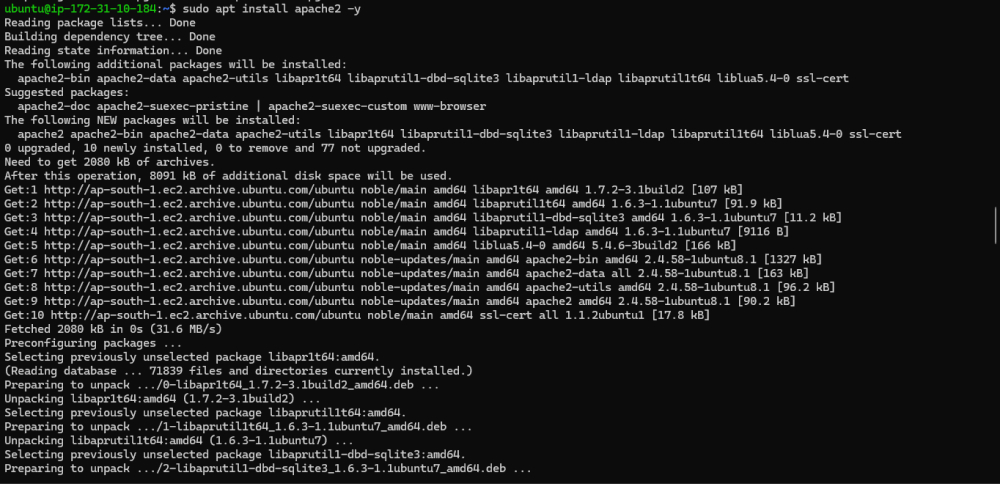
- Start the web server and enable it to start on boot:
sudo systemctl start apache2
sudo systemctl enable apache2

Step 5: Deploy Your Website
1. Create a simple website.
cd ~
mkdir “new-folder-name”
cd “new-folder-name”
echo ‘<html><head><title>My Web Page</title></head><body><h1>Hello World!</h1></body></html>’ > index.html


2. Upload your website files to the web server directory. For Apache, this is typically /var/www/html/:
sudo cp -r /path/to/your/website/* /var/www/html/
3. Set the correct permissions for your files:
sudo chown -R www-data:www-data /var/www/html/

Step 6: Test Your Website
1. Open your web browser and navigate to your instance’s public DNS or your domain name.
2. Check that your website loads correctly and that all links and resources are functioning.

Conclusion:
By following these steps, you can successfully host a website on an AWS EC2 instance. This setup provides flexibility, scalability, and control over your web hosting environment. AWS offers a range of tools and services to further enhance your website's performance, security, and management, making it an excellent choice for both small and large-scale web projects. Happy hosting!