Loading...
Microsoft Lab 8 – DHCP (Dynamic Host Configuration Protocol)
Dynamic Host Configuration Protocol (DHCP)
In Lab 8 - Dynamic Host Configuration Protocol (DHCP), participants typically engage in the configuration and management of DHCP services on a Windows Server environment. This lab involves tasks such as installing and configuring the DHCP server role, defining IP address scopes, setting lease durations, and implementing DHCP relay agents if needed. Participants may also explore advanced configurations, including DHCP reservations, options, and failover for high availability. The lab aims to provide hands-on experience in deploying and maintaining DHCP services, ensuring efficient IP address allocation and management within the network. Successful completion of Microsoft Lab 8 equips participants with essential skills in DHCP administration, contributing to seamless IP address assignment and network connectivity in a Windows Server environment.
Lab:
- DHCP (Dynamic Host Configuration Protocol) is a protocol used to provide quick, automatic, and centralized management for the distribution of IP addresses from a pool of IP addresses within a network.
- DHCP is also used to configure the proper subnet mask, default gateway, and DNS server information on the device.
- It is implemented with two UDP port numbers for its operations which are the same as for the BOOTP protocol. UDP port number 67 is the destination port of a server, and UDP port number 68 is used by the client.
- DHCP server leases an address to a new device for a period of time, called the DHCP lease time. When the lease expires, the DHCP server might assign the IP address to a different device. The default lease time is 8-days for the DHCP server which can be modified
DHCP Working (DORA Process)
- DORA is the 4 steps process of assigning an IP Address for clients by the DHCP Server.
- Discover – Sent by the DHCP client to find a willing DHCP server
- Offer – Sent by a DHCP server to offer to lease to that client a specific IP address (and inform the client of its other parameters) •
- Request – Sent by the DHCP client to ask the server to lease the IPv4 address listed in the Offer message.
- Acknowledgment – Sent by the DHCP server to assign the address, and to list the mask, default router, and DNS server IP addresses
DHCP Relay Agent
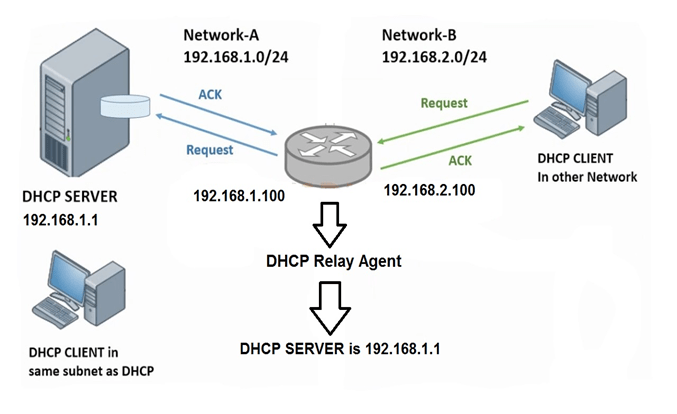
- The DHCP Relay Agent makes it possible for DHCP broadcast messages to be sent over routers that do not support the forwarding of these types of messages.
- The DHCP Relay Agent is therefore the routing protocol that enables DHCP clients to obtain IP addresses from a DHCP server on a remote subnet, or which is not located on the local subnet.
- If you have no configured DHCP Relay Agent, your clients would only be able to obtain IP addresses from the DHCP server which is on the same subnet. To enable clients to obtain IP addresses from a DHCP server on a remote subnet, you have to configure the DHCP Relay Agent on the subnet that contains the remote clients, so that it can relay DHCP broadcast messages to your DHCP server.
- Thus you do have to configure DHCP Server at each branch office or each network. A single DHCP server can assign IP to devices present at different branch offices or networks with the help of DHCP Relay Agent.
- This can be cost-saving as well as centralized IP management
LAB
Adding DHCP Role using Server Manager
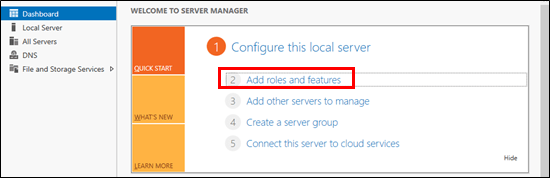
- Open Server Manager on the Dashboard, click Add Roles and Features
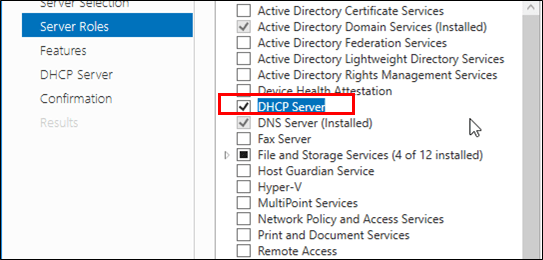
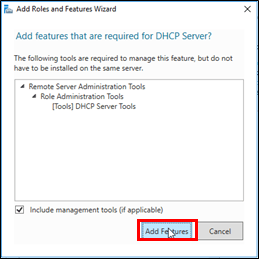
2. Select the DHCP Server role for installation. When a new window opens and asks you for permission to install more needed features, in order to work the DHCP server correctly, click on the Add Features button then click on the Next button
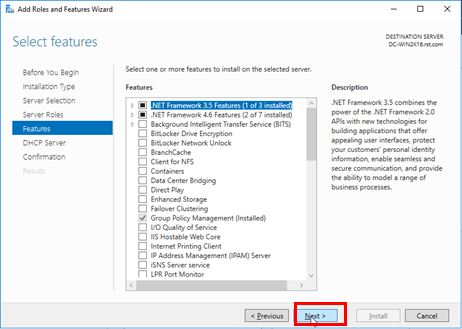
3. On the Features page nothing else needs to be added so we can click Next
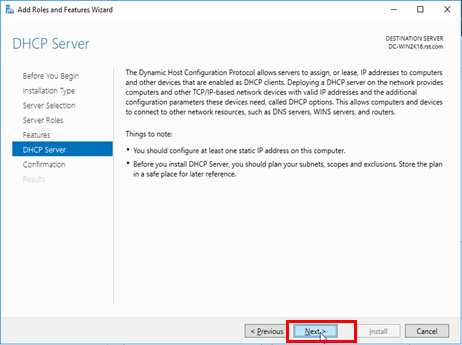
4. DHCP Server page gives you some critical information about DHCP server. Read the information and hit Next
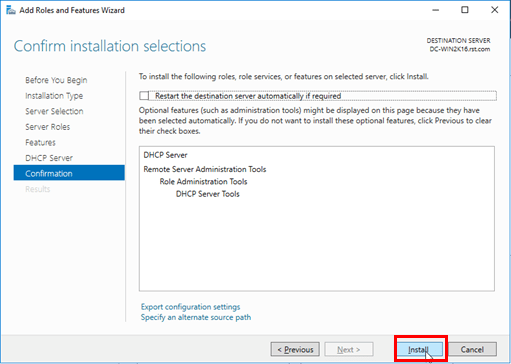
5. After clicking Install, the installation process for the roles and features selected will begin
Adding DHCP Role using Powershell
- Open Powershell and Run as an Administrator
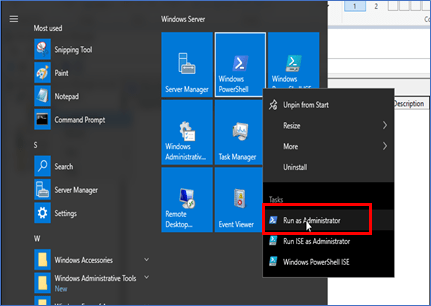
2. Command: Install-WindowsFeature –Name DHCP -IncludeManagementTools

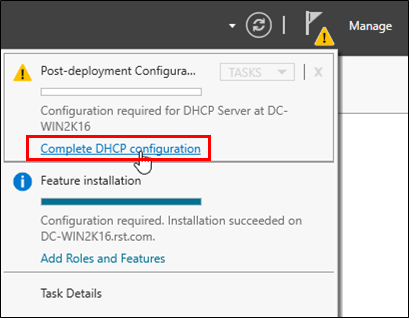
DHCP Server Post Installation Configuration
- When the DHCP role installed, open Server Manager. Click on flag. Then click on Complete DHCP configuration
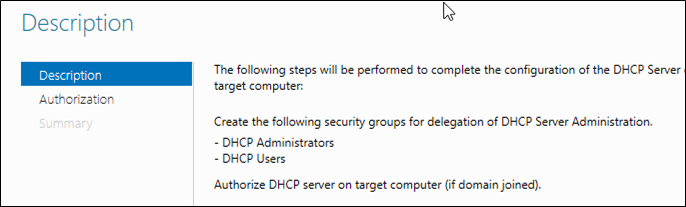
2. Skip the Description page by clicking on Next button
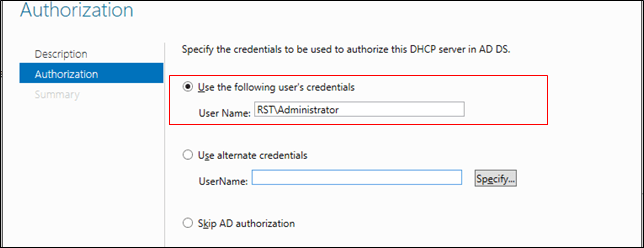
3. Now enter the credentials that have permissions to perform these tasks. Then click on Commit button
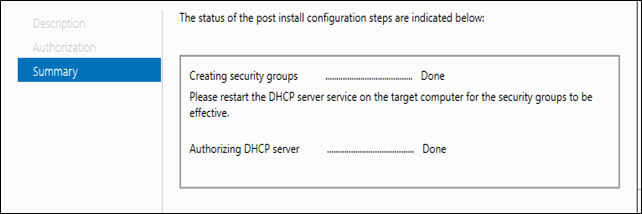
4. The Summary page show you the summary of post installation configurations. Click on the Close button
DHCP Configuration
- Scope
- Reservation
- Filter
- Super-Scope
- Multicast Scope
- Split Scope
- DHCP failover
- Backup
- Restore
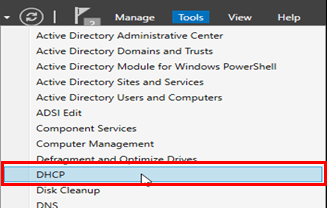
- To access DHCP -> Open Server Manager -> Tools -> Select DHCP
2. We can look at the DHCP console and then the different things that it can accomplish

3. Scopes – are the collection of the IP addresses and subnet masks, along with some additional options that you want this particular DHCP server to issue. You can have more than one scope, in fact, you can have scope for each network that you may have on your corporate environment. Now for a DHCP server to be active it needs at least one scope
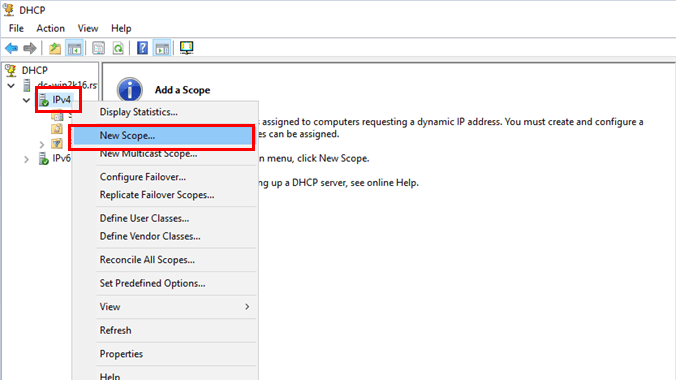
When the DHCP opened, expand the DHCP server name and right-click on IPv4 then click on the New Scope option to create an IP scope for distribution
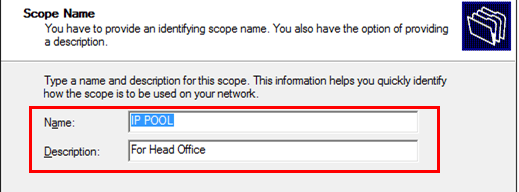
4. Type scope name, Add a Description for scope, Then Click on Next button
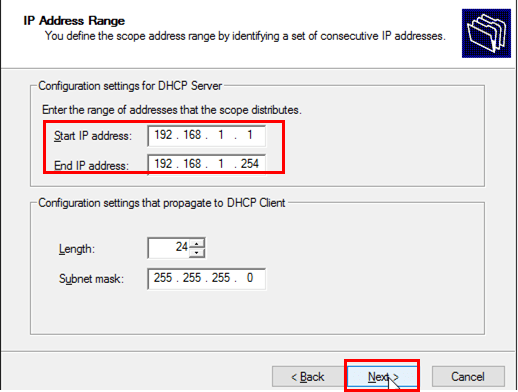
5. Specify the IP Address Range by entering the start IP Address and End IP address. The length will automatically assigns, based IP address class and also the subnet mask assigns automatically. Then click on Next button
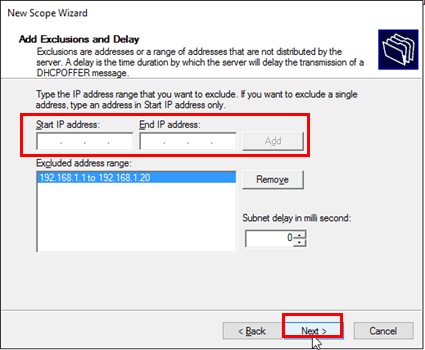
6. You can exclude some of the IP addresses for the servers or especial services. The IPs excluded will not be assigned automatically. IPs before and after the exclusion range are assigned. IPs excluded are assigned on servers manually
Specify the IP range you want to exclude, add the IP range and click on Next button
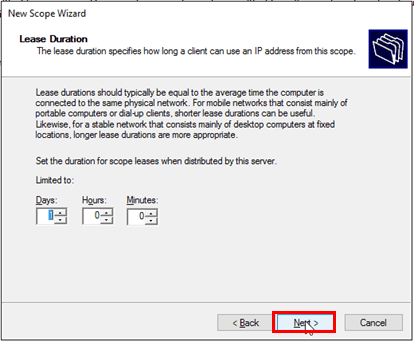
7. Specify the Lease duration which is for how long a client can use an IP address from scope and Click on Next
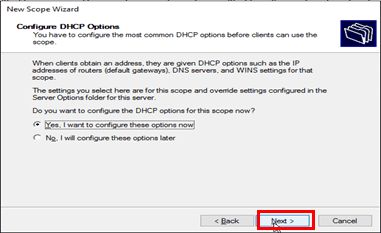
8. On the Configure DHCP option page, select this option: Yes, I want to configure these options now
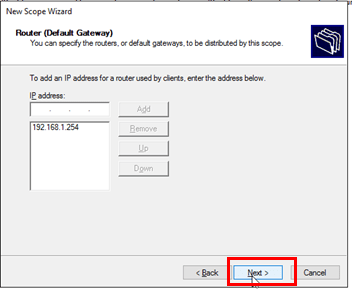
9. On Router (Default Gateway) page, add you gateway and click next
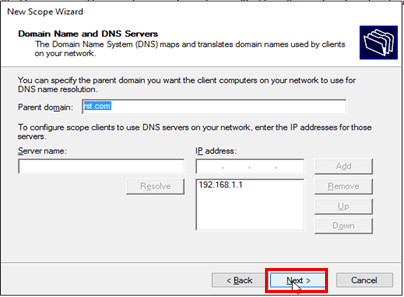
10. Domain Name and DNS Servers page, Under normal circumstances the wizard will detect the DNS server that is installed during the installation of the domain.Click Next
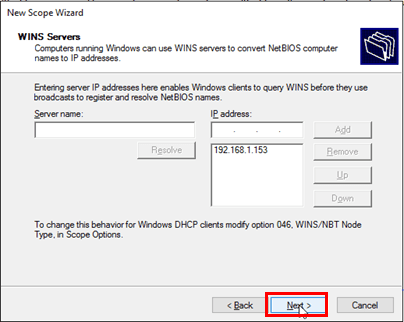
11. WINS Server page, I don’t have WINS so I will click Next
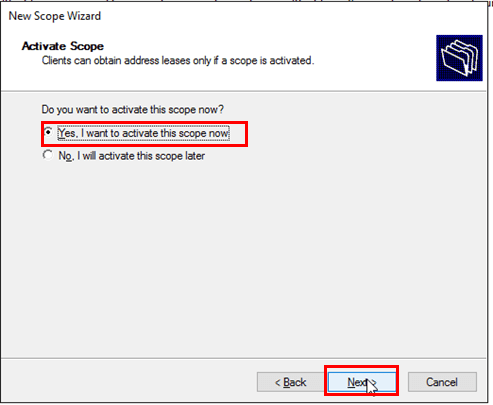
12. On Activate Scope page, Select – Yes, I want to activate this scope now then click Next
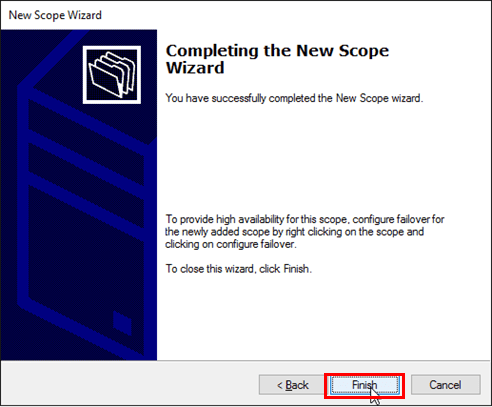
13. That’s it click on Finish
14. That’s it, Scope is created and underneath the Scope we have different Options
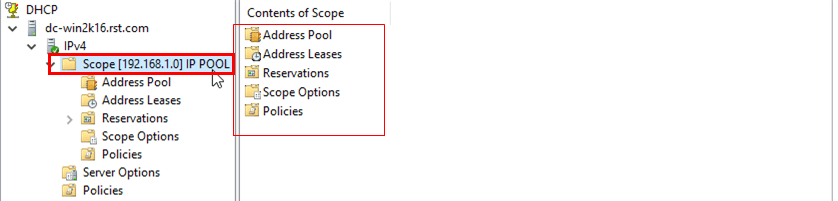
- Address Pool: which shows Address range and Exclusions for distribution

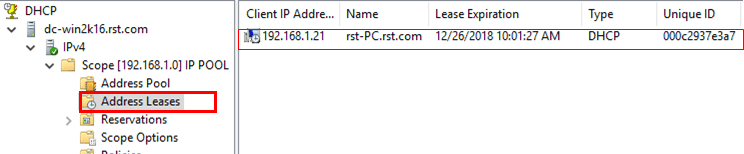
- Address Leases: We can see the current leases. This is where the leases will displayed
–
Reservation
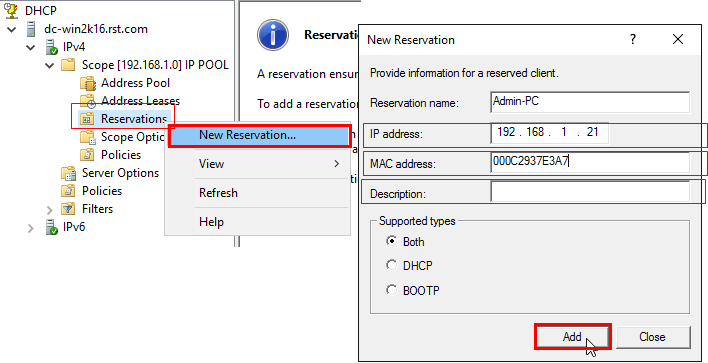
Reservation: A reservation ensures that a DHCP client is always assigned the same IP address
Give your Reservation a name and then the IP address with MAC address of that client for which we want to reserve. Click Add
- Scope Options: When we configure this, changes will apply only to this scope

Server Options
- Server Options are Additional configuration parameters that a DHCP server can assign to DHCP clients
- Some commonly used options include IP addresses for Default gateways (routers), WINS servers, and DNS servers
- When we configure this, changes will apply to all of the scopes that we have
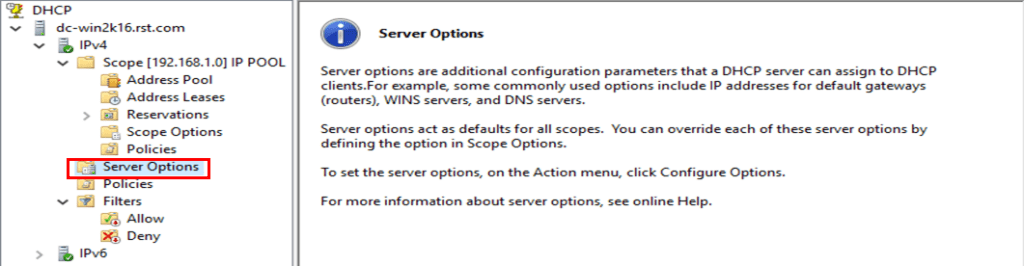
[ Note: This is not a good place to put in a Default gateway. If we have two different networks, they’re going to have two different default gateways. This is a good place to put in a DNS server that maybe everybody from both those networks is going to use ]
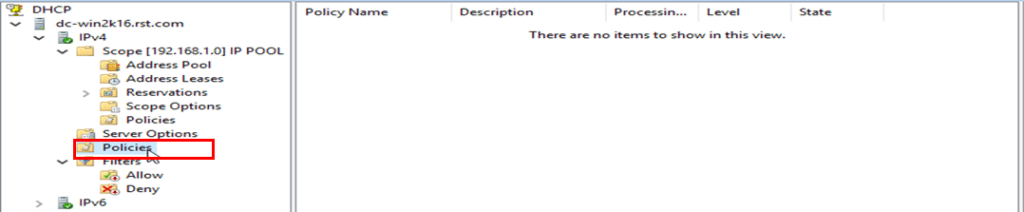
Policies
Policies: policies are a mechanism to allow you to determine for specific types of equipment coming in that correspond to different characteristics, what kinds of DHCP options will those machines actually get
- Policies are a mechanism to allow you to determine for specific types of equipment coming in that correspond to different characteristics, what kinds of DHCP options will those machines actually get.
- An enterprise network has several types of devices – desktops, printers, mobiles, laptops, etc. An enterprise administrator would need to ensure that all these different types of devices are provisioned appropriately for network connectivity.
- You want different types of clients to get IP addresses from different IP address ranges within the subnet. By specifying a different IP address range for different device types, you can more easily identify and manage devices on the network
Filters
- Filters are a mechanism which allows us to allow or deny machines from receiving DHCP services
- By default both filters i.e Allow and Deny filter both are disabled (indicated as Red down arrow)
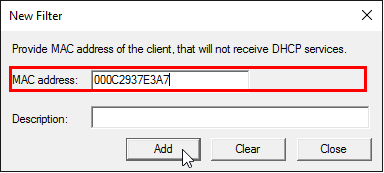
- Expand Filters and right click on Deny then click on New Filter

- Just punch in a MAC address, and a Description, and this client will not receive DHCP services.
- Then Enable the Filter
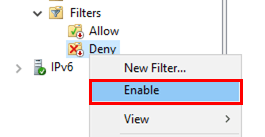
[ Note: Even though Allow filter is disabled, addresses are leased from the pool. Once we configure it with allow list, it will only lease addresses for the client in Allow filter list ]
Super-Scope
- A Super-scope allows several distinct scopes to be logically grouped under a single name
- Super-scope expands the number of IP network addresses that can use in a network
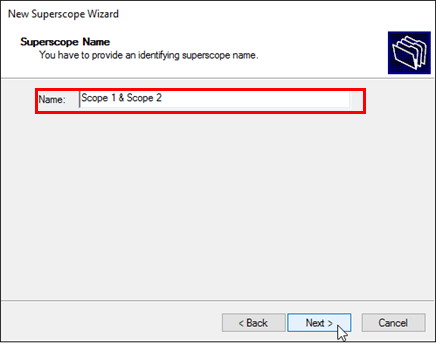
- Right-Click on IPv4 and select New Superscope

- On Superscope Name page, type in the Name and click Next
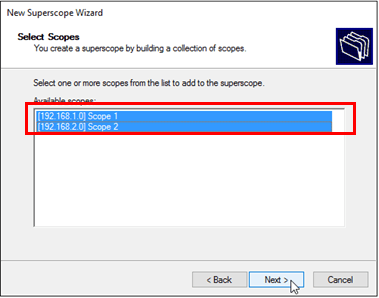
- On Select Scopes page, select Scopes and click Next and Finish
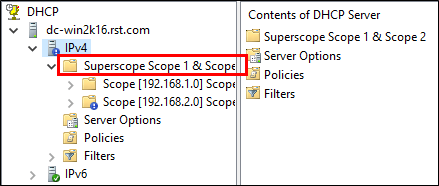
- These two are now consolidated together into this Superscope object
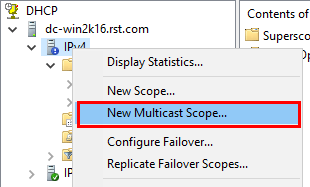
Multicast-Scope
- Multicast is a one to many transaction. You lease the content onto the network in one time, and multiple machines pick it up at the same time. This can be used for streaming any kind of content
- On Multicast Scope Name page, give it a name and Click Next

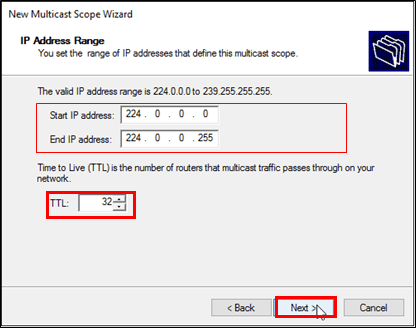
- On IP Address Range page, type in Start IP and End IP
- TTL time to live, or in other words, the number of hops through routers that this address can actually pass through. and Click Next
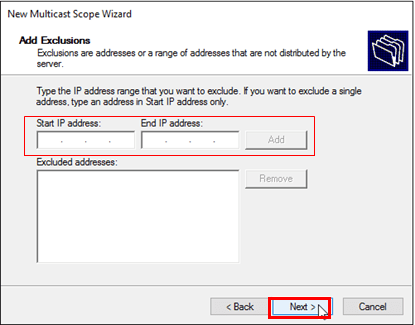
- On Add Exclusion page, add IP addresses which you would like to exclude and click Next
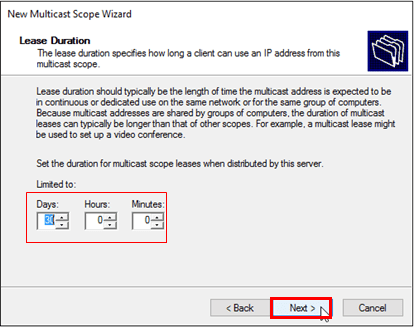
- On Lease Duration page, leave it as default (30 Days)
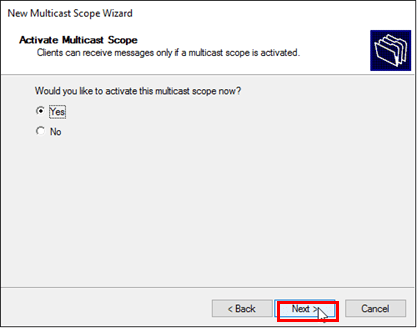
- On Activate Multicast scope page, click Next and Finish
Split-Scope
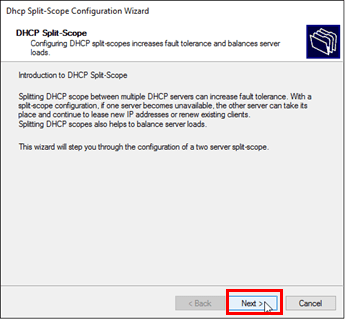
- Splitting to DHCP Split-Scope between multiple DHCP servers can increase fault tolerance
- With Split-Scope configuration, if one server becomes unavailable, the other server can take its place and continue to lease new IP addresses or renew existing clients.
- Splitting DHCP scopes also helps to balance server loads
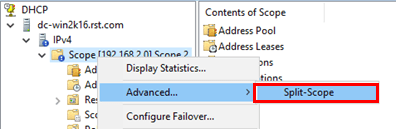
- Right click on the Scope that is to be split and press the Advanced menu item and Split-Scope menu item
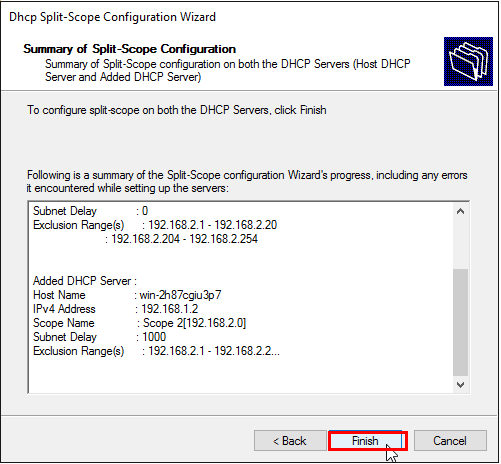
- DHCP Split-Scope Wizard will pop-up. Click Next
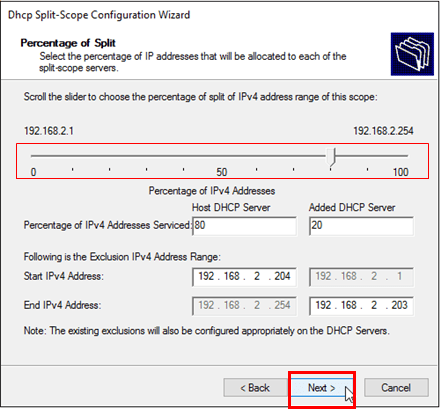
- Now we need to identify what we want the percentage, essentially the split between these two servers to be. Click Next
[ Note : The best practice for years and years has been 80/20, but you can literally drag this slider to whatever you want, 50/50, or some other configuration ]
- Now we need to identify what we want the percentage, essentially the split between these two servers to be. Click Next
- On Delay on DHCP Offer, now we have the option to choose whether or not we’re going to have, or implement a delay in the DHCP offer

[ Note : if you’re going to setup sort of a failover scenario where the second machine will only respond if the first machine doesn’t ]
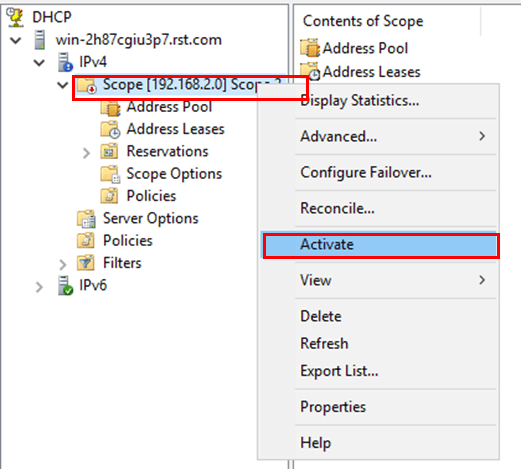
- The scope is now added to the 2nd server, to finish the setup, right click the Scope and choose Activate
Failover
- DHCP Failover enables high availability of DHCP services by synchronizing IP address lease information between two DHCP servers.
- DHCP failover also provides Load Balancing of DHCP request
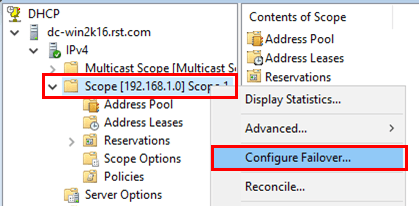
- Right click on IPv4 of primary DHCP and select Configure Failover
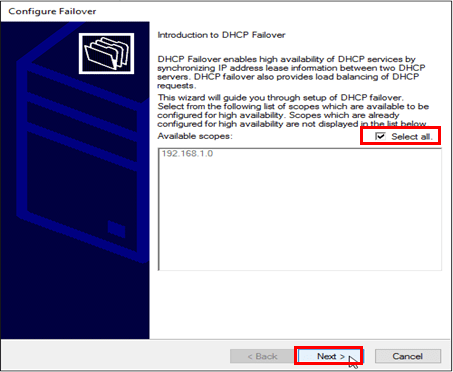
- On the welcome page of Configure Failover select Select all Or select your scope which you want to configure for High Availability ) and click Next
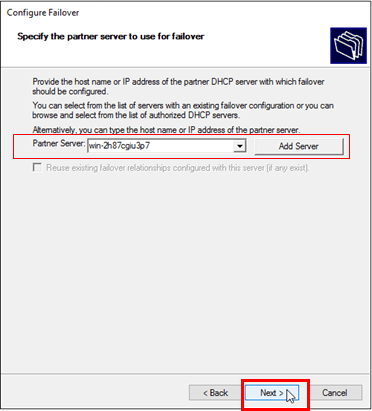
- On Specify the partner server. Add the second DHCP server and click Next
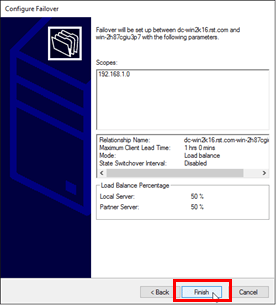
- On the Create a new failover relationship page, The Relationship Name is just these two machines
- we can set a Maximum Client Lead Time,
- we can determine what the Mode (Load Balance / Hot StandBy)
- State Switchover Interval: When you activate this DHCP says, okay, 60 minutes have to pass before we enable ourself to failover/failback, Click Next

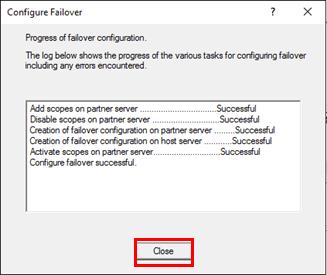
- Finally click Finish to set up failover between two servers. Make sure the process should be finished successfully.
- Close the page
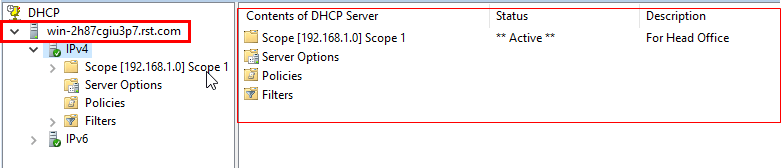
- Refresh the DHCP console on 2nd Server to see the final result. Now the DHCP servers are ready to work as DHCP load balancing service
Backup
- DHCP server in an organization may require backup and restore of DHCP database in an event of
- Hardware failure
- Software failure
- Migration
- Fault configuration change
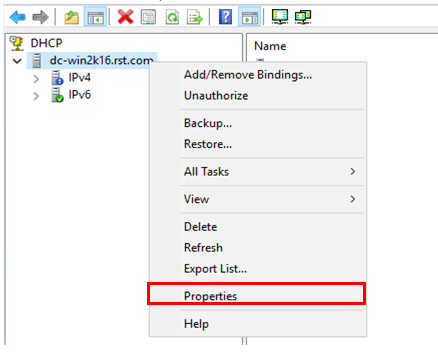
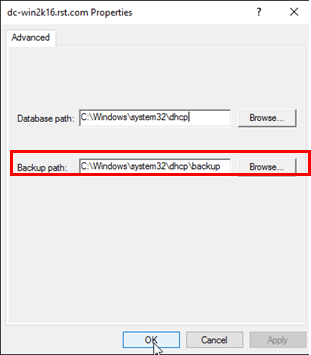
- Microsoft automatically back up the DHCP database every 60 minutes by default. To see Default Path Right-click on the server node and click properties
- C:\Windows\system32\dhcp\backup. This is the default path
-
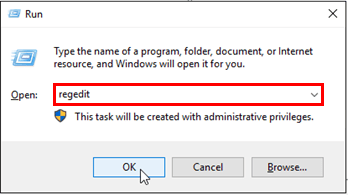
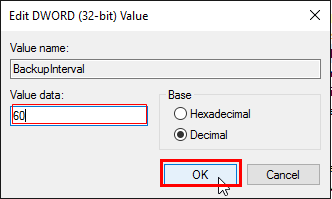
But we can change its schedule as per our requirement. To do that we need to do some registry key edit.
-
To open the registry mmc, go to Run > regedit
- Then go to path HKEY_LOCAL_MACHINE\SYSTEM\CurrentControlSet\Services\DHCPServer\Parameters. In there you will be able to see a key called BackupInterval
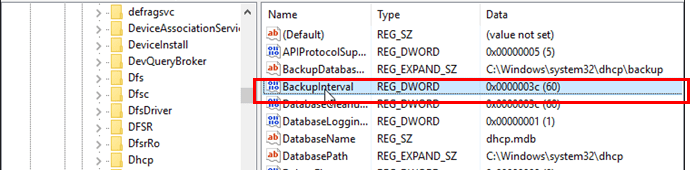
- We can change the BackupInterval time from here
- But if we want to do Backup manually at any point of time then first right-click on DHCP server and select Backup options
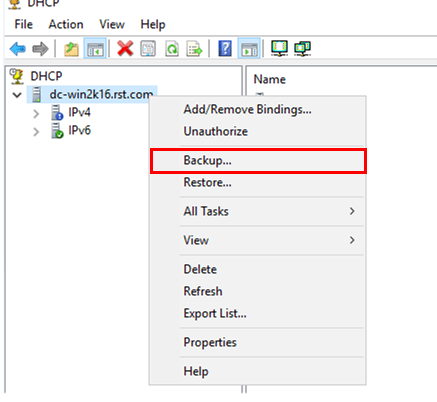
- Windows\system32\dhcp\backup – as this is the default location where your backup get stored when you run a backup

Restore
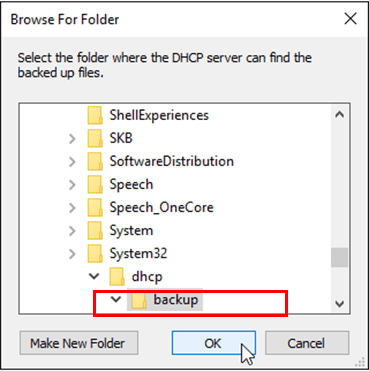
- If we want to Restore DHCP then first right-click on DHCP server and select Restore options
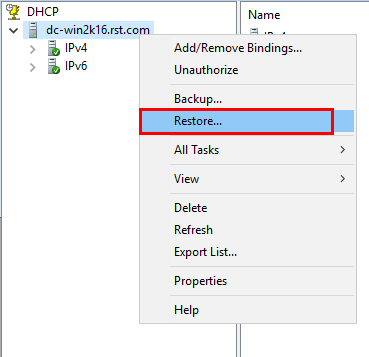
- Then browse for Folder from where to take backup